Best Practice for Western Blot Detection of Proteins Present in Tissue Lysates
Overview
Best Practice for Western Blot Detection of Proteins Present in Tissue Lysates | Download as PDF
Generating reproducible and reliable blots, when your sample is tissue, can be challenging. At Bio-Rad, we have developed a set of tips to ensure robust data generation and cleaner blots.
1. Process your Tissue Quickly
Harvest and process tissue samples with clean tools. To remove contaminants, which could impact protein stability, briefly wash in ice-cold, neutral pH buffer. After washing, flash-freeze the tissue in liquid nitrogen to preserve protein structures and features such as post-translational modifications (PTMs). Tissue samples can be kept on ice for immediate homogenization; however as protein degradation may still occur at -20°C, tissue samples should be kept at -80°C for long-term storage.
2. Choose the Lysis Buffer Carefully
When selecting the optimal lysis buffer to efficiently extract proteins from tissues, take into account parameters such as pH, ionic strength, and type of detergents and denaturants. Radioimmunoprecipitation assay buffer (RIPA) is the most widely used lysis buffer. The cellular localization of target proteins should also be considered during buffer selection; for example, for cytoplasmic proteins, Tris-HCl lysis buffers are recommended, while RIPA is preferred for extracting nuclear proteins. To enrich low-abundance proteins in membrane, cytosolic, or nuclear fractions, tissue fractionation might be required. The amount of lysis buffer is based on the size/weight of the tissue; considering the buffer-to-tissue ratio is important to ensure efficient lysis. When first establishing a protocol for extracting proteins from tissues, try different lysis buffers to optimize conditions for your tissue type and specific protein.
3. Select the Optimal Disruption Method
Harsher disruption methods, like homogenization techniques, are required for tissues due to the higher degree of sample structure compared to cells. To further dissociate the tissue and to shear cellular DNA, sonication of samples might be needed. It is important to avoid foaming during this step as it may decrease your recovery volume. Ensure that you have optimized the power settings on mechanical disruptors and use pre-chilled equipment. More information on this topic can be found in our “Five Tips for Picking the Right Cell Disruption Method for Protein Analysis” video.
As lipids can impact the quality of your western blots, ensure you remove fat from your samples. Extraction of proteins from plant tissues is particularly challenging, as they are rich in proteases and contain high levels of metabolites that can interfere with protein extraction (Wang et al. 2008). The extraction process has to be optimized for the specific plant tissue you are using. Several protein extraction protocols, such as trichloroacetic acid/acetone precipitation method or phenol-based extraction, have been developed for plant tissues (Wang et al. 2008).
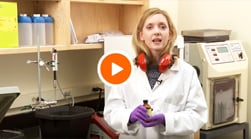
Fig. 1. Five Tips for Picking the Right Cell Disruption Method for Protein Analysis.
4. Inhibit Protein Degradation and Conserve Post-translational Modifications During Sample Preparation
Disruption of cell membranes releases enzymes that can degrade proteins despite minimizing their activity by keeping the samples at low temperature (Scopes 1994). To limit protease activity, strong denaturing agents, like urea, can be added to the buffer. However, these conditions could affect the integrity of certain proteins, therefore lysis buffers are routinely supplemented with protease inhibitor cocktails. Common protease inhibitors include phenylmethylsulfonyl fluoride (PMSF), aprotinin, leupeptin and pepstatin.
The identification of SUMOylated proteins can be particularly challenging. This is due to the activity of isopeptidases that remove the SUMO conjugates; and that often only a small fraction of a protein is SUMOylated. Therefore, to conserve SUMOylation, the addition of isopeptidase inhibitors to the lysis buffer is recommended (Xiao et al. 2015). Removal of ubiquitin conjugates can also easily occur by protein ubiquitin hydrolases, known as deubiquitylases (DUBs). For this reason, it is essential to add EDTA or EGTA as well as iodoacetamide (IAA) or N-ethylmaleimide (NEM) to the cell lysis buffer. IAA and NEM are commonly used at a concentration of 5-10 mM. However, up to tenfold higher concentrations are crucial to maintain ubiquitylation of certain proteins, such as IRAK1 (Emmerich and Cohen 2015). Treatment with the proteasome inhibitor MG132, also preserves ubiquitylation and blocks protein degradation by the 26S proteasome (Kisselev et al. 2012).
5. Quantify your Sample before Gel Loading
Determining sample concentrations ensures equal loading of gels and enables you to compare differences in protein levels in treated versus untreated samples, or during experimental time courses. Bradford assays, like Bio-Rad’s Quick Start Bradford Protein Assay, (Figure 2), are routinely used for the standardization of total protein loading per well. However, the Bradford method is not reliable if samples comprise both insoluble and soluble proteins, which re-emphasizes the importance of proper homogenization.
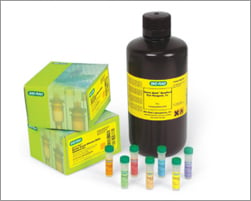
Fig. 2. Quick Start Bradford Protein Assay Kit 4 (5000204).
6. Find the Best Gel
A good starting point to determine the most suitable gel for your target protein is to select the polyacrylamide percentage according to the molecular weight of your protein. For example, for high molecular weight, choose a low percentage and for low molecular weight, a high percentage. If you want to detect a single protein, choose nongradient gels. Select gradient gels when visualization of a range of protein sizes is required. Very high voltage settings may cause the gel to “smile”; to avoid this effect, run your gel in the cold room and use prechilled running buffers.
Use our guide to select the most appropriate gel for your application at bio-rad.com/featured/en/gel-selector.html
7. Verify Protein Loading
Select the optimal loading control based on the cellular localization of your protein. Popular loading controls for cytoplasmic proteins include housekeeping proteins, such as beta-actin or beta-tubulin; for nuclear proteins, histone H1 or histone H3 are commonly used. In recent years, a number of studies have reported that some of the most commonly used housekeeping proteins are unsuitable for reliable protein normalization, highlighting that physiological and pathological factors can affect their expression level (Ferguson et al. 2005). For a loading control to be meaningful, it is essential that levels remain constant in different experimental conditions; for example, expression of your loading control should not be affected by treatments. Even within a single tissue sample, beta-actin expression has been shown not to be homogeneous (Eaton et al. 2013). This feature highlights the problem with using housekeeping proteins for comparative protein level analysis.
Another common issue with housekeeping proteins is overloading, which results in detection being outside the dynamic range. The dynamic range of a sample depends both on the tissue and the protein determination method.
A good alternative to housekeeping proteins and visualization of protein loading with dyes, like Ponceau S, is Bio-Rad’s stain-free imaging technology. This technology enables the normalizing of bands to total protein in each lane (Figure 1, Taylor et al. 2013). The method is quick and uses trihalo compounds that are incorporated into the gel to make proteins fluoresce upon photoactivation. To be detected by stain-free technology, a protein must contain at least two tryptophan residues (Yadav and Liu 2014). In comparison to Ponceau S staining, stain-free technology offers increased linear range and reduced variability (Rivero-Gutierrez et al. 2014). In addition, it is very convenient as staining of blots is not required.

Fig. 3. Linear dynamic range provided by stain-free technology for total protein measurements. A, HeLa cell lysate dilutions from 80–2.5 µg total protein; B, HeLa cell lysate dilutions from 20–1 µg total protein.
See how total protein normalization leads to better western blotting results at bioradiations.com/defining-the-new-normal-in-quantitative-western-blot-data
8. Consider the Membrane Type
Proteins can be transferred onto nitrocellulose or polyvinylidene difluoride (PVDF) membranes. PVDF membranes have high mechanical strength and are most suitable when membrane stripping and reprobing are required. PVDF is hydrophobic and requires presoaking in methanol. Nitrocellulose membranes have high signal-to-noise ratios and do not require methanol pretreatment. It is important to note that nitrocellulose membranes cannot be used with transfer buffers containing SDS. When selecting the membrane type, you may also want to consider other parameters, such as pore size, which impact the binding efficiency of larger versus smaller proteins.
See how to effectively transfer your proteins at bioradiations.com/six-tips-for-efficient-transfer-of-your-proteins
9. Reduce High Background from Endogenous Immunoglobulins
When performing western blot detection of tissue lysates, signals from endogenous IgGs and nonspecific secondary antibody binding may obscure detection of low abundant proteins or proteins of a certain molecular weight. This is especially true for proteins of ~50 kDa and ~25 kDa which may be masked by IgG heavy and light chains generated during the denaturing and reducing steps of tissue sample preparation.
The IgG chains are then routinely detected by conventional secondary antibodies that bind to both IgG heavy and light chains. This problem is most pronounced when using tissue samples, such as thymus or thyroid that are part of the immune system and therefore contain a larger amount of endogenous immunoglobulins (Figure 4).
TidyBlot Western Blot Detection Reagent (STAR209P and STAR209PA), only binds to the native antibody used for the western blot detection and therefore provides a good solution to generate clean tissue lysate blots.
See how to effectively transfer your proteins at bioradiations.com/six-tips-for-efficient-transfer-of-your-proteins
-HRP Antibody.")
Fig. 4. Background staining in different tissue lysates using Immun-Star Goat Anti-Mouse (GAM)-HRP Antibody.
10. Include Suitable Controls
To ensure the specificity of the primary antibody it is important to use positive and negative tissue controls. For positive controls, use a tissue type reported to express high levels of your target protein, tissues from mice expressing tagged versions of your target proteins, or recombinant proteins. Recommended negative controls include secondary antibody-only controls (omitting the primary antibody incubation step) and samples from a tissue known not to express the target protein. It might be helpful to include a specific knockout sample or tissue-specific knockout mouse model to confirm the specificity of the antibody by showing that the target is not detected in a certain tissue type.
You also need to be aware that quantitative differences in the amount of specific proteins exist in diseases states; a phenomenon commonly reported in scientific literature. To account for these differences you can include samples from both healthy and disease tissue to analyze aberrant expression.
To master the art and science of western blotting, watch our webinars for helpful tips on factors that are crucial for the success of your western blots at info.bio-rad.com/ww-PQDwebinars
Download Now - Best Practice for Western Blot Detection of Proteins Present in Tissue Lysates
Western Blotting Tips
Western Blotting Selector Tool
Get the best reagents and consumables to ensure optimized western blotting performance.

References
- Bio-Rad Laboratories (2015). Five Tips for Picking the Right Cell Disruption Method for Protein Analysis. https://www.youtube.com/watch?v=nUfxxIeu1yM, accessed May 24, 2018.
- Bio-rad.com (no date). Stain-Free Imaging Technology. , accessed May 24, 2018.
- Eaton SL et al. (2013). Total protein analysis as a reliable loading control for quantitative fluorescent Western blotting. PLoS ONE 8(8): e72457.
- Emmerich CH and Cohen P (2015). Optimising methods for the preservation, capture and identification of ubiquitin chains and ubiquitylated proteins by immunoblotting. Anal Biochem 466(1):1-14.
- Ferguson RE et al. (2005). Housekeeping genes: A preliminary study illustrating some limitations as useful references in protein expression studies. Proteomics 5(2):566-71.
- Kisselev AF et al. (2012). Proteasome inhibitors: an expanding army attacking a unique target. Chem Biol 19, 99-115.
- Rivero-Gutierrez B et al. (2014). Stain-free detection as loading control alternative to Ponceau and housekeeping protein immunodetection in Western blotting. Anal Biochem 15, 467, 1-3.
- Scopes RK (1994). Protein purification (New York, NY: Springer New York).
- Taylor SC et al. (2013). A Defined Methodology for Reliable Quantification of Western Blot Data. Mol Biotechnol 55(3), 217–226.
- Wang W et al. (2008). Optimizing protein extraction from plant tissues for enhanced proteomics analysis. J Sep Sci 31(11), 2032-9.
- Xiao Y et al. (2015). Can your protein be sumoylated? A quick summary and important tips to study SUMO-modified proteins. Anal Biochem 15, 95-97.
- Yadav G and Liu N (2014). Trends in protein separation and analysis — the advance of stain-free technology. bioradiations.com/trends-in-protein-separation-and-analysis-theadvance-of-stain-free-technology, accessed August 7, 2018.
Related Topics
- Immunoprecipitation tested antibodies
- PrecisionAb antibodies for western blotting
- Western blot accessory reagents
Support
- Contact our technical services department
- Western blot resources
- TidyBlot WB detection reagent:HRP flyer
- TidyBlot reagent: Frequently asked questions
Popular Resources

Generate Western Blot Data You Can Trust
Best practices for image documentation, integrity, and verification.
TidyBlot Western Blot Detection Reagent:HRP
TidyBlot Reagent:HRP is a western blotting detection reagent that specifically binds to native (non-reduced) antibodies.